Biscuit’s field notes
Four weapons, one growing forge
Choose the right reach and firing pattern for the mess in front of you. Here is how the four battle weapons work together.
Developer-maintained game guide · Reviewed

Choose Zoomie Hose for steady fire, Crumb Hugger for nearby targets, Side-Eye Scope for distant lines, and Oopsie Bomb for clusters. Switch with keys 1–4 or the battle buttons. One equipped forge core powers all four, so a stronger core improves your whole toolkit.
One forge core, four ways to fire
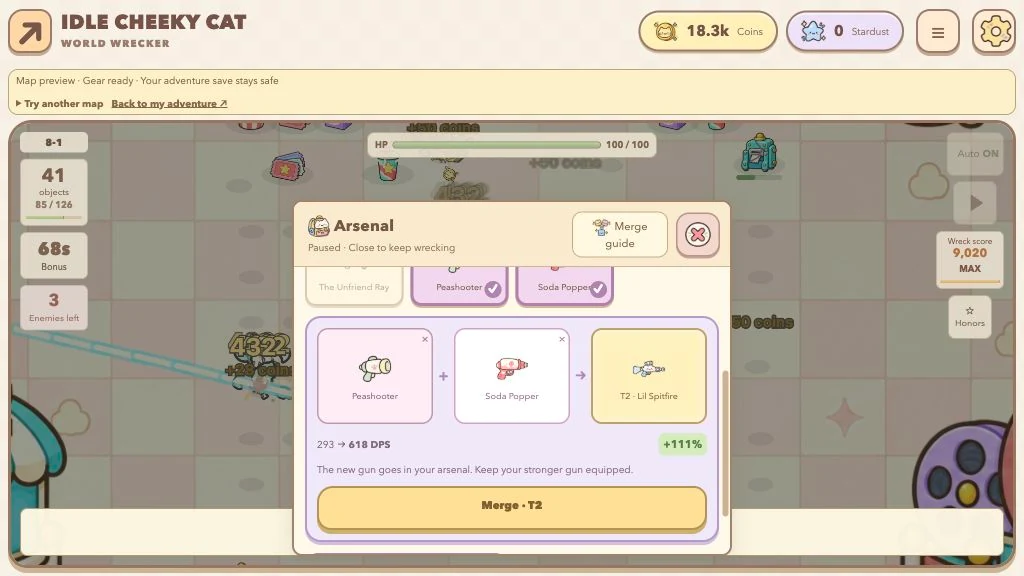
The Arsenal contains 65 named guns across five tiers. Think of the equipped gun as your forge core: its power, tier, and refinement feed every battle weapon. The four combat buttons decide how that power reaches a target. Owning a rocket-shaped core does not lock you into Oopsie Bomb, and a laser-shaped core does not add a fifth firing mode.
This distinction makes merging easier to understand. Compare the merge preview and the equipped core’s power, then choose a combat role for the situation. You can use every role without collecting a matching gun shape first. The full core catalogue and merging guide covers the collection, tiers, and ingredients. Try the free weapon merge calculator to compare two catalogue cores before choosing a pair in your Arsenal.
Watch all four weapons in the same scene
These short, silent clips use the game’s actual combat code and artwork in a prepared tutorial scene. The equipped core, upgrades, target layout, starting position and aim are held constant. Only the selected battle weapon changes. Each clip runs for seven seconds with a Tier 1 Peashooter core, no boosts and no Stardust. The nine targets come from Endless Area 7, rearranged into a 3 × 3 group with their original health. These durable props make the firing patterns easier to follow.
Use them to compare reach, spread, piercing and recharge. They are demonstrations of firing patterns, not a ranking of measured damage or campaign clear times. Each clip starts fresh; one weapon does not inherit another’s damage.
Press play to load a clip. Use the player’s full-screen button for a closer look. Nothing plays automatically.
2 Crumb HuggerClose · Watch where the pellets spread
3 Side-Eye ScopeFar · Watch the line through the targets
4 Oopsie BombBomb · Watch the blast and recharge
Try the same decision in your next run: open the free game, switch with keys 1–4, and look at what each shot actually reaches. If a run seems stuck after the big targets fall, follow the illustrated cleanup checklist.
Compare the four battle weapons
The ranges below are game-world units. Firing cadence runs from Tier 1 to Tier 5 with no Fire Rate boosts. These are weapon rules, not promised clear times: missed shots, scattered pellets, and targets outside the blast all change the result.
| Weapon / key | Range | Firing cadence | Pattern |
|---|---|---|---|
| 1 Zoomie Hose Spray | 420 | 12–18 / sec | One projectile per shot |
| 2 Crumb Hugger Close | 220 | 3–3.48 / sec | 7–9 pellets per burst |
| 3 Side-Eye Scope Far | 720 | 2.5–2.9 / sec | Up to 2 targets; 3 from Tier 4 |
| 4 Oopsie Bomb Bomb | 560 | One blast / 6s | 120–160-unit blast radius |
Zoomie Hose: keep the pressure on
Spray is the starting selection and a useful general-purpose choice. Its 420-unit reach gives you room to move while maintaining frequent fire. Use it when targets are spread out or when you need to keep damaging a pursuer without committing to close range. It has neither piercing nor splash, so track what your stream actually hits.
Crumb Hugger: make the pellets count
Close fires a wide burst with seven pellets at Tiers 1–2, eight at Tiers 3–4, and nine at Tier 5. Its 220-unit reach is the shortest. Move close enough for several pellets to connect, while leaving space to avoid enemy warnings. A wide burst looks impressive even when most pellets pass beside a small target; closing the gap is often more useful than waiting.
Side-Eye Scope: work the angle
Far reaches 720 units and sends a narrow shot through up to two targets, increasing to three at Tier 4. Look for a firing angle that puts objects or enemies behind each other. Its value comes from reach and a useful line through several targets. Against one isolated target, the longer range alone does not make it the strongest damage choice.
Oopsie Bomb: fire, then switch
Bomb reaches 560 units and reloads for six seconds of active battle time. Its blast radius grows from 120 to 160 units with core tier. A direct collision deals the full hit; other targets inside the blast receive 70% of that damage. A shot can also detonate at your aim point within range, so you can place the explosion inside a group. A nearer object can intercept it first.
A simple routine for a crowded map
- Read the nearest threat. Give enemy warning circles and firing lanes priority over reaching another prop.
- Use a ready Bomb on a useful cluster. Aim where several targets can share the blast, then return to sustained fire.
- Match the remaining distance. Use Spray while moving, Close when several pellets can land, or Far when a distant line gives piercing something to do.
- Check the counters after the explosion. Clear surviving props and enemies before moving to the next area.
Switching does not reset Bomb’s recharge. Its timer continues while another role is active, which lets you keep working between blasts. Holding fire can continue through a switch; you do not need a fresh click for every weapon change. On touch screens, tap the role buttons and use the movement and FIRE controls described in how to play.
The level guide identifies lanes, clusters, and giant-object layouts. Against a boss, choose a role that lets you keep a safe route open; the enemy and boss guide explains the warnings to watch.
Why the power number is not the whole fight
Merges, refinement, Damage boosts, Fire Rate boosts, and Stardust can strengthen the shared core. Each role then applies its own firing pattern. Scatter’s displayed output assumes its pellets connect; piercing needs targets in line; Bomb’s number describes a blast rather than a continuous stream. Compare like with like before deciding a lower number is a downgrade.
The Rebirth and upgrades guide explains which gains persist through a reset. Upgrading the core does not increase enemy health: campaign enemy budgets are fixed by level.
Weapon loadout questions
Which weapon should a beginner use?
Start with Zoomie Hose, then try the others when the map gives you an obvious reason: nearby groups, a distant line, or a cluster ready for a blast. This is a practical starting routine, not a universal ranking.
Can I carry four different upgraded cores at once?
You can own several cores, but only one is equipped to power combat. Switching battle roles uses that same core; it does not select another inventory item.
Where should I go after testing the weapons?
Return to battle, browse the wiki index, or take a quieter detour through the daily postcard collection.